Zapper (tazer)
Work Unit Download
Download this Work Unit:
Open the project's directory and locate the "Actor-Mixer Hierarchy" folder. You want to place the downloaded Work Unit inside this folder.
Now open the Wwise Project. If the Project was already opened, it may prompt to refresh/restart the app.
Event(s)
Go into the Events tab. The following image of Events3 is required to be made, in order to replace the sound properly. Please recreate the image in its folder structure, and naming.
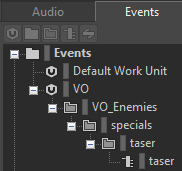
taser
We'll come back to this event later.
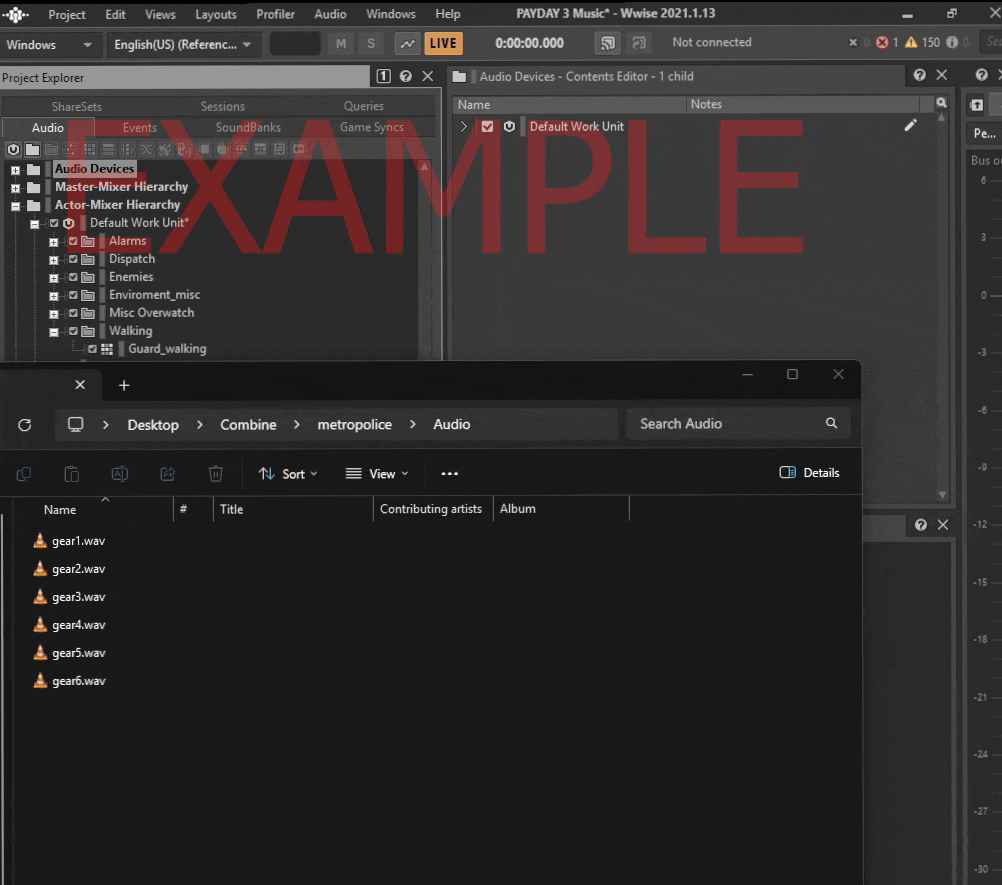
Now go into the Audio tab, and find the "Actor-Mixer Hierarchy" section.
Under the section should be the Work Unit you imported previously. It'll contain the containers that you import your audio (.wav) files into.
Due to how Wwise handles imports, there are 2 settings that need to be applied for the audio to both work and sound good.
We're editing this container:

Output Bus
The first field that needs to be changed is the Output Bus
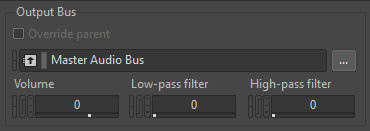
Click on the 3 dots next to it, and navigate to:
Master-Mixer Hierarchy > Default Work Unit > Master Audio Bus > Main > VO > VO_NPC
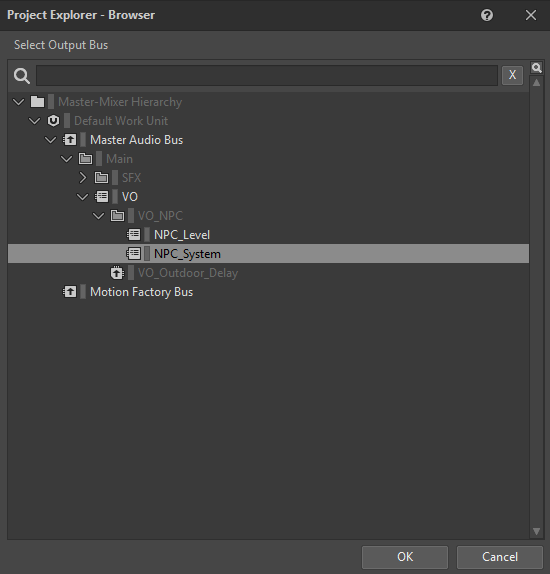
Select NPC_System and click OK
Global Obstruction
Next, go into the RTPC tab in the Container Property Editor
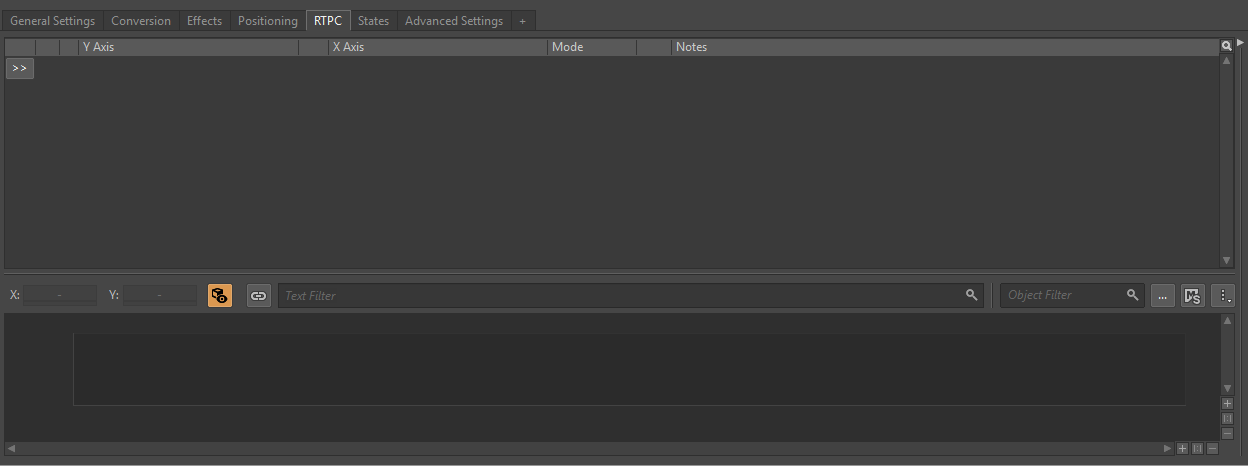
This tab will be responsible how much the audio will lower when it comes to walls, doors, and floors being in the way.
Due to how much this is up to you, this is a separate page entirely that can be opened here.
Audio Importing
Importing audio is easy. From file explorer, select the audio you want to use, and drag it onto the respective Container.
A window will open on import settings, for this you want to import it as a Sound Voice. Everything else can be left on its default setting.
If you want a preview of what to expect, Wwise has controls to play, pause, and stop the currently selected container/audio.
If you're not sure what some of the random Containers mean with their name. You can install this mod for Payday 3 that says those Containers in Text To Speech, in-game. It can also be paired with this mod, to help get results faster.
Once you're happy with your work, go back to the Events tab.
Events, again
Open the events that were created previously, a window like this should be open:
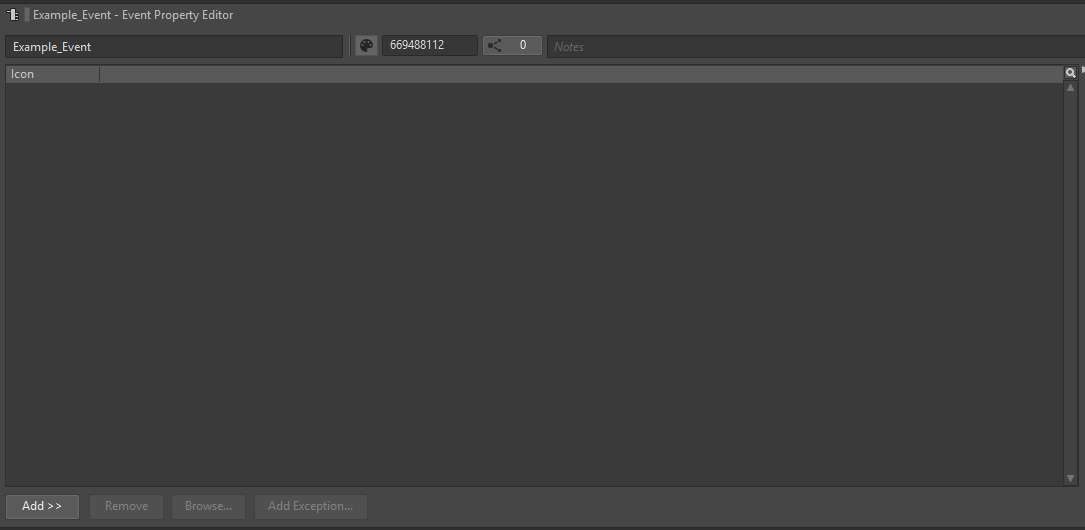
On the bottom left, there's an option to "Add >>". Click on it, and click "Browse Object..."
Then search for the Switch Container3
Once you find it, select and press OK.
Paking
Press Ctrl+S to save, and open the Unreal Engine Project you downloaded in First Time Setup1
Proceed to "Paking Your Mod" on the left hand side of the page